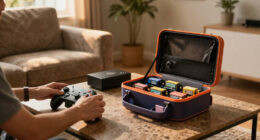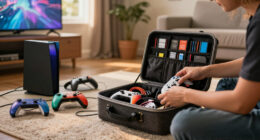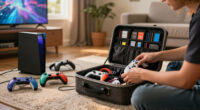
Set up gaming storage cases for your consoles, controllers, games, cables, and accessories so each item has a protected place and is easy to retrieve. This guide is for gamers organizing a home setup, preparing gear for travel, or sorting a growing collection. No specialist skills are required; allow 45-90 minutes to take inventory, measure equipment, select cases, and arrange everything.

Play games on Amazon Luna for your game nights, included with Prime
- A rotating selection of games, no download needed
- Play on TV, laptop or phone
- Fast, free delivery for your gear, too

Nargos Video Game Storage Tower for PS5, PS4, PS3, Xbox and Blu-ray Cases, Black
- ✔ Capacity: Up to 36 cases
- ✔ Compatible cases: PS5, PS4, PS3, Xbox Series X/S, Xbox One, standard Blu-ray
- ✔ Incompatible cases: DVD, Xbox 360, PS2, slim cases

Tutata Magnetic Video Game and Blu-ray Storage Box, Holds up to 20 Cases
- ✔ Capacity: Up to 20 cases
- ✔ Internal dimensions: 12 × 6.7 × 5.3 in
- ✔ External dimensions: 12.4 × 6.9 × 5.5 in

Video Game Disc Rack Tower for PS5, PS4, Xbox, and Nintendo Switch
- ✔ Capacity: Up to 40 game discs
- ✔ Slot dimensions: 0.59 in W × 6.85 in H
- ✔ Item dimensions: 4.72 × 7.87 × 15.75 in (D × W × H)
Difficulty: Beginner | Time: 45-90 minutes
What You’ll Need
Tools & Materials:
- Tape measure or ruler
- Notebook or phone for recording measurements and inventory
- Soft cloth for cleaning equipment
- Storage cases, bins, or organizers suited to your gear
- Optional labels and removable cable ties
Knowledge:
- Basic familiarity with your gaming equipment
- Ability to measure items and compare dimensions
Check the manufacturer’s care guidance for consoles, batteries, discs, and other sensitive items. Store equipment dry and at room temperature. Do not pack a console while it is warm or leave batteries loose with metal objects.
Nargos Video Game Storage Tower for PS5, PS4, PS3, Xbox and Blu-ray Cases, Black
The Nargos tower is our most balanced pick for someone who wants to organize a substantial collection of compatible game or standard Blu-ray cases without dedicating much floor space. It holds up to 36 cases in a column measuring about 30.4 inches tall, and its tool-free snap-together design keeps setup simple. If that height does not suit your room, the tower can be arranged horizontally instead. Non-slip base pads add some stability when it is standing upright.Compared with the Tutata box, Nargos provides more stated capacity and leaves cases accessible on an open rack, but it does not enclose them or stack like a box. It also holds fewer items than the disc rack’s stated 40 discs, though those capacity figures describe different things. Compatibility is the deciding limitation: it fits listed PS5, PS4, PS3, Xbox Series X/S, Xbox One, and standard Blu-ray cases, but not DVD, Xbox 360, PS2, or slim cases. We would choose it for a collection made up mostly of the compatible formats, and skip it if the shelf would need to accommodate a mixed assortment of older or slimmer cases.
Pros:
- Stores up to 36 compatible game or standard Blu-ray cases.
- Can be arranged vertically or horizontally to suit the room.
- Tool-free snap-together setup.
- Lightweight ABS plastic with non-slip base pads.
Cons:
- Does not fit DVD, Xbox 360, PS2, or slim cases.
- Open rack design does not enclose or conceal the collection.
Best for: Collectors with up to 36 compatible full-size console game or standard Blu-ray cases who want a tool-free rack that can stand tall or lie horizontally.
Not ideal for: People storing DVDs, Xbox 360, PS2, or slim cases, or anyone who wants a closed, dust-covering container.
Bottom line: We recommend Nargos as the most versatile all-around case rack when your collection matches its compatibility list.
“We recommend Nargos as the most versatile all-around case rack when your collection matches its compatibility list.”
Tutata Magnetic Video Game and Blu-ray Storage Box, Holds up to 20 Cases
When keeping cases together and enclosed matters more than fitting the largest collection, Tutata’s magnetic storage box fills a gap the two open towers do not. It holds up to 20 cases, and its 5.3-inch height keeps titles visible for browsing rather than burying them in a tall stack. The magnetic closure is designed for repeated opening and closing, while the water-resistant laminate and rigid cardboard construction make the box stackable.This is a different kind of organizer from the Nargos tower: Tutata trades open, immediate access and higher stated capacity for an enclosed, stackable format. It is also less dependent on a permanent floor footprint than either tower. The tradeoff is preparation: it arrives flat and must be assembled by peeling a sticker, forming the box, and gluing it. Although it is designed for most cases, the dimensions make measuring your collection sensible before assembly. We would choose it for a selected group of steelbooks or Blu-ray cases that needs a tidier, covered home; for a large set of games that needs quick browsing, Nargos is the more direct option.
Pros:
- Encloses up to 20 cases with a magnetic closure.
- Title-up layout helps make stored cases easier to browse.
- Rigid, water-resistant laminated cardboard is stackable.
- Compact rectangular format keeps a selected collection together.
Cons:
- Arrives flat and requires assembly, including gluing.
- Designed for most cases, so actual case dimensions should be checked.
- Holds fewer cases than the Nargos tower’s stated capacity.
Best for: People who want to enclose and stack up to 20 measured game, steelbook, or Blu-ray cases, with titles visible for browsing.
Not ideal for: Large collections that exceed 20 cases, users who want an open rack, or buyers unwilling to assemble and measure the box.
Bottom line: We favor Tutata when enclosed, stackable storage for a smaller measured collection matters more than maximum capacity.
“We favor Tutata when enclosed, stackable storage for a smaller measured collection matters more than maximum capacity.”
Video Game Disc Rack Tower for PS5, PS4, Xbox, and Nintendo Switch
The Video Game Disc Rack Tower is the capacity-led choice, with room for up to 40 game discs and listed compatibility that includes Nintendo Switch as well as PS5, PS4, and Xbox One/Series. It is smaller in height than Nargos at 15.75 inches, and its 4.72-inch depth and 7.87-inch width make it a compact option for a game-room surface. The rack can be set vertically or horizontally, and its tool-free assembly and stable base keep the setup uncomplicated.Compared with Nargos, the disc rack’s higher stated count and Switch compatibility may suit a different collection, but its product description refers to discs, so we would not assume it holds 40 boxed cases. The 0.59-inch slot width is important to check against the items you plan to store. The rack is not sized for Xbox 360 cases or DVDs, which limits its usefulness for mixed media. Tutata offers a closed container, while this rack favors visible, open storage. Choose this model when your collection matches the listed formats and narrow slots; if broader case flexibility is the priority, Nargos is the safer starting point.
Pros:
- Stated capacity of up to 40 game discs.
- Lists compatibility with Nintendo Switch, PS5, PS4, and Xbox One/Series.
- Can be positioned vertically or horizontally.
- Compact footprint with tool-free assembly and a stable base.
Cons:
- Not sized for Xbox 360 game cases or DVDs.
- The 0.59-inch slot width may limit which items fit.
- Capacity is described as discs, so it should not be assumed to mean 40 boxed cases.
Best for: Players organizing a compatible collection of up to 40 discs, including Nintendo Switch, who want a compact rack with two orientation options.
Not ideal for: People storing DVDs or Xbox 360 cases, or anyone who needs an enclosed box or confirmed capacity for assorted case sizes.
Bottom line: We recommend this rack for compatible disc collections that benefit from high stated capacity in a compact, open organizer.
“We recommend this rack for compatible disc collections that benefit from high stated capacity in a compact, open organizer.”
As an Amazon Associate we earn from qualifying purchases.
Before You Start
Decide whether you are organizing equipment for everyday access, long-term storage, or travel. These uses call for different cases: a shelf bin may work at home, while travel gear needs a secure closure and padding. Keep ventilation needs in mind. Storage cases are for powered-off equipment; do not run a console inside a closed case.
Inventory what you own before buying anything. Include the console and its stand, controllers, games, charging gear, headsets, docks, adapters, and cables. Measure bulky or irregular items at their widest points, including protruding plugs and attached parts. Record dimensions and leave room for padding or dividers.
Step-by-Step Instructions
Step 1: Sort your gaming gear
Gather the items you want to store and group them by type: consoles, handheld systems, controllers, games, cables, and small accessories. Set aside damaged, duplicate, or unused items for separate decisions. Write down each group’s approximate quantity and note which items you use most often.
Tip: Keep each system’s essential accessories together, but do not bundle unrelated cables just because they look similar.
Check: You have a written inventory grouped by equipment type, with frequently used items identified.
Step 2: Measure the items and storage area
Measure the length, width, and height of each large item. Include attached grips, stands, docks, or plugs when they will remain in place. Measure the shelf, cabinet, or travel space where each case must fit. Record the measurements and leave clearance for padding, dividers, and easy removal.
Tip: For a travel case, check the packed dimensions against your transport limits. A case that fits the console but not its power supply may create a second, less protected bundle.
Check: Your notes include the dimensions of the largest items and the space available for the cases.
Step 3: Choose cases for each use
Select cases based on what they need to hold and how often you will move them. Use padded, fitted cases for fragile equipment in transit; choose stackable bins or shelf organizers for home storage. Look for adjustable dividers for mixed accessories, secure closures for travel, and a size that fits your measurements without forcing items inside.
Tip: Avoid cases that trap heat or moisture around equipment. For home storage, leave ventilation space around consoles and follow the device maker’s storage guidance.
Check: Each case has a clear purpose, fits its intended location, and can hold its assigned items with room for protection.
Step 4: Prepare cases and equipment
Open each case and remove loose packaging or debris. Wipe equipment with a clean, dry, soft cloth, then let it cool and dry fully before packing. Arrange dividers or padding so hard surfaces, screens, and sticks will not press against one another. Keep liquids and food away from the storage area.
Tip: Do not use cleaning sprays directly on electronics, and do not wrap equipment in damp cloths.
Check: The cases are clean and dry, and their interiors have a planned space for each item.
Step 5: Pack consoles and handheld systems
Place each console or handheld in a compartment sized for it, using the case’s padding or a soft sleeve to limit movement. Store detachable stands or docks in a separate padded space. Protect screens from pressure, and position handheld sticks so they are not pushed by the lid or nearby objects.
Tip: Do not force a lid closed. If it presses on a screen, control stick, or connector, rearrange the contents or use a larger case.
Check: The system sits securely without bending, rattling, or touching hard accessories in a way that could scratch it.
Step 6: Organize controllers, games, and accessories
Place controllers in individual slots or separate padded sections. Store game cards and discs in their cases or a purpose-built holder, away from loose items that can scratch them. Use small compartments for adapters, memory cards, and dongles. Keep batteries installed only when the device maker permits it; otherwise, remove them for storage.
Tip: Group small accessories by system and label the compartment so a receiver or adapter does not get separated from the device it serves.
Check: Controllers and media are protected, and small parts are contained in labeled or clearly designated compartments.
Step 7: Bundle and label cables
Identify each cable before storing it, then coil it loosely without sharp bends. Secure coils with reusable ties or soft hook-and-loop straps. Put power cables and signal cables in separate compartments when possible, and label both the cable and its destination if they are easy to confuse.
Tip: Do not wrap cables tightly around a power brick or use thin ties that pinch the cable jacket.
Check: Cables are untangled, labeled where needed, and stored without tight kinks or strain at the connectors.
Step 8: Place cases and check access
Put frequently used cases where you can reach them without moving heavy equipment. Store heavier cases low and stable; stack only cases designed to support stacking. Leave room around consoles that remain on a shelf, and keep storage away from damp floors, direct sunlight, heaters, and vents.
Tip: Keep a travel case near your usual packing area, but do not leave it in a hot car or a humid garage.
Check: Cases are stable, accessible, and stored in a dry location with appropriate space around any equipment used there.
Step 9: Test the packing and update your inventory
Close each case gently and lift or move it the way you expect to during normal use. Listen for rattling and check that nothing shifts into screens, sticks, or connectors. Reopen the case if items moved, add or adjust dividers, then record what each case holds and where it is stored.
Tip: A simple list on the case or in your phone can save time when you pack for a trip or look for one adapter.
Check: Each case closes without pressure, its contents stay in place when moved, and your inventory matches the packed contents.
Common Mistakes to Avoid
- Buying a case based only on a product name or approximate size. — Compare interior dimensions with your own measurements, including plugs, stands, and padding.
- Packing equipment tightly enough that the lid presses on screens or controls. — Test the fit before travel and leave enough clearance to close the case without force.
- Putting loose adapters and cables together without labels. — Group accessories by system, secure cable coils loosely, and label items that look alike.
- Storing gear in a damp, hot, or poorly ventilated place. — Choose a dry indoor location, protect unused gear from heat and sunlight, and keep operating consoles in an open, ventilated setup.
Troubleshooting
Problem: The case will not close easily.
Solution: Remove the contents and check for items protruding above the dividers. Reposition them or choose a roomier case; do not compress the lid onto equipment.
Problem: Items rattle or shift when you carry the case.
Solution: Add fitted padding or reposition adjustable dividers. Keep small parts in closed pouches and repeat the movement check before travel.
Problem: You cannot tell which cable or adapter belongs to a device.
Solution: Check the connector and device labels, then mark both ends or store the item in a labeled compartment with its matching device.
Problem: The stored gear feels damp or develops a musty smell.
Solution: Move it to a dry indoor area and let equipment and cases air out fully before repacking. Check maker guidance before using any moisture absorber near electronics.
What Success Looks Like
Your setup is complete when every item on your inventory has a designated storage place, cases fit their contents without pressure, and fragile equipment cannot strike loose accessories during normal handling. Cables should be identifiable and free of tight kinks; cases should be stable, dry, and easy to access. Open each case once more and compare its contents with your inventory.
Next Steps
After each gaming session or trip, return gear to its assigned compartment and update your inventory if you add or remove items. Recheck case fit when you buy a new device or accessory. Before travel, inspect closures and padding, and keep equipment powered off and cool before packing.
Frequently Asked Questions
Can I store a console in a case while it is running?
No. Use cases for powered-off storage or transport. Running consoles need open airflow to release heat; follow the manufacturer’s ventilation instructions during use.
Should I remove batteries before storing a controller?
Follow the controller and battery maker’s guidance. For extended storage, removing loose or replaceable batteries can reduce the chance of leakage; keep removed batteries in a safe, separate location.
How much space should I leave around a console in its case?
Leave enough room for the case’s padding without pressing on vents, ports, screens, or controls. The console should not shift freely, but the lid should close without force.
Are plastic bins suitable for gaming equipment?
They can work for dry, cool home storage when items are protected from impact and the bin is not overloaded. Use padded, purpose-built cases for delicate gear that will be carried or exposed to bumps.
How often should I reorganize gaming storage?
Review it when you add or retire equipment, and check before a trip. Remove dust and confirm that cases and labels still match what you store inside.